Choosing a blade for eye surgery is a small decision with precise consequences. A clear corneal incision may be only a few millimeters wide, yet its shape and consistency can affect the surgeon’s view and workflow. The World Health Organization’s World Report on Vision estimates that at least 2.2 billion people worldwide have near or distance vision impairment. This figure describes a broad health need, not demand for any single instrument. Still, it underscores why dependable ophthalmic care—and the tools used to provide it—deserve careful attention.
Ophthalmic Blades differ in tip geometry, edge design, material, handle compatibility, and packaging. Those details matter at the sterile field, where a blade must match the intended procedure and the surgeon’s technique. The right choice is not automatically the sharpest or least expensive option. It is the one supported by clear specifications, consistent manufacturing, appropriate quality documentation, and practical evaluation by qualified clinical teams. Small differences count. This guide presents seven useful considerations for comparing blades, from incision requirements to supplier support and traceability. Product descriptions can help, but they cannot replace clinical judgment or local protocols. And one caution is easy to overlook: a familiar model may not be the best fit for every procedure.
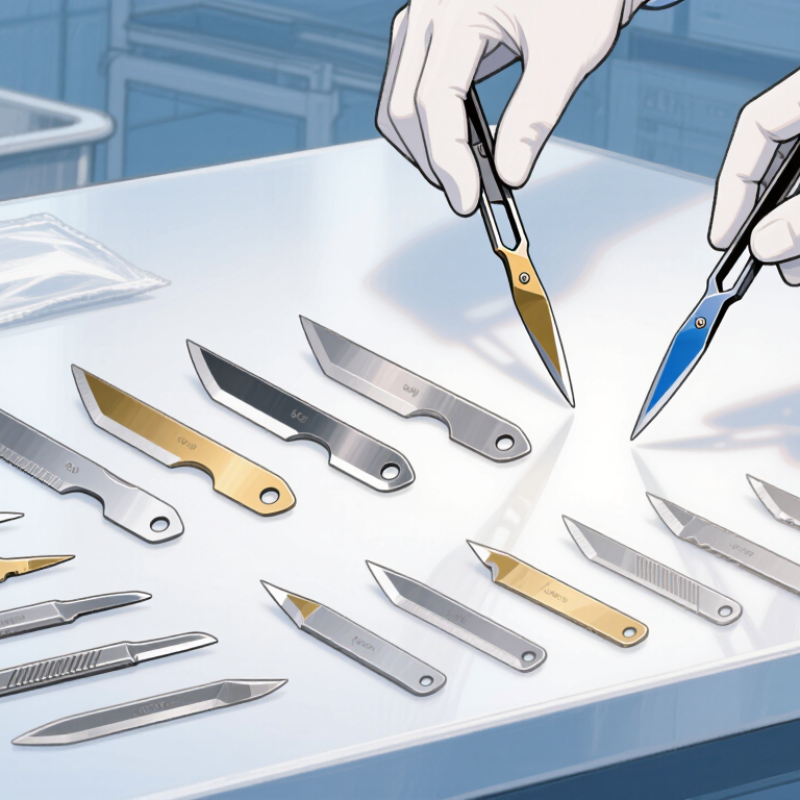
Before selecting an ophthalmic blade, define the procedure and the incision it requires. A cataract procedure, for example, may call for a precise corneal entry, while another operation may need a different location, shape, or access route. The blade’s width and profile should match the surgeon’s planned incision, not simply the instrument already available. Small details matter. A mismatch can affect incision control and may complicate the intended approach.
Review the planned incision length, tissue, and required blade geometry with the operating surgeon. Straight, angled, and curved profiles serve different purposes, so check the instrument’s specifications and instructions for use before selection. Consider the handle and visibility, too; a blade that is difficult to orient under the microscope can make a small task less predictable. It sounds straightforward, but “small incision” does not describe every requirement. The same procedure may call for different blade choices based on the patient and surgical plan. That is worth pausing over. Follow established facility protocols, and have a qualified eye-care professional confirm that the selected sterile blade suits the intended procedure.
Choosing an ophthalmic blade starts with the incision, not the instrument’s appearance. A narrow, sharp-pointed blade may suit a controlled entry, while a crescent shape can help create a broader, tunnel-like incision. Angled blades may improve access when the approach or surrounding anatomy limits hand position. Small differences matter.
Match blade width and length to the planned incision and the surgeon’s technique. A blade that is too wide may enlarge an opening unnecessarily; one that is too narrow may require adjustments. Consider the tissue involved, the desired incision architecture, and how much control the task demands. Keep it practical.
Before selection, check the procedure plan, instrument specifications, and facility protocols. Sterility, blade integrity, and reliable handling are essential; a damaged tip can compromise precision. The smallest blade is not automatically the best choice. Nor is a familiar shape always suitable. These decisions can seem straightforward, yet patient anatomy and surgical goals vary. When uncertain, confirm the intended dimensions and design with the operating team rather than relying on habit.
Material, sharpness, and edge quality deserve separate checks. Stainless-steel and diamond blades have different handling and edge-retention characteristics; neither material guarantees a clean incision. Match the blade’s documented design to the intended procedure, and check its sterility and packaging. The World Health Organization’s 2019 World Report on Vision estimated that at least 2.2 billion people live with near or distance vision impairment. That figure is not a blade-performance measure, but it underscores why careful surgical instrument selection matters.
Sharpness is more than how easily a blade enters tissue. A smooth, consistent edge can help support controlled cutting, while burrs or chips may interfere with that control. Inspect the tip and edge under magnification when appropriate, looking for symmetry, a continuous cutting line, and visible damage. Tiny defects matter. Compare handling only within approved clinical procedures; feel alone is subjective and cannot confirm edge quality. There is no single sharpness score that suits every incision, so rely on validated product specifications and local instrument protocols. A small scratch can be hard to notice. That part is easy to overlook.
When choosing ophthalmic blades, treat sterility as a documented condition, not a visual impression. Check the sterile-barrier label, sterilization method, lot number, and expiry date before opening. The WHO’s 2022 Global Report on Infection Prevention and Control estimated that 7 in 100 patients in high-income acute-care hospitals acquire at least one healthcare-associated infection; the estimate was 15 in 100 in low- and middle-income settings. These figures cover many causes, not blades alone, but they show why sterile handling deserves attention.
Inspect the pouch under good light. Look for punctures, moisture, crushed corners, broken seals, or printing you cannot read. ISO 11607-1 describes requirements for packaging systems intended to maintain sterility in terminally sterilized medical devices until use. It cannot make damaged packaging acceptable. A clean-looking pouch is not proof of sterility, either. When something seems wrong, pause and follow your facility’s procedure rather than guessing.
Quality checks should extend beyond the package. Confirm that lot information is traceable and that the supplier can provide relevant sterilization and quality-system documentation, including alignment with ISO 13485. The CDC’s 2015 estimate—about 1 in 31 U.S. hospital patients had at least one healthcare-associated infection on a given day—offers broader context, not blade-specific risk. Small details matter. I would still question whether a quick visual check is enough; it is only one part of verification.
| Tip | What to Check | Useful Evidence or Acceptance Criteria |
|---|---|---|
| 1. Verify sterility | Confirm whether the blade is supplied sterile and identify the sterilization method stated by the manufacturer. | Check the label and instructions for use (IFU). For sterile products, review documentation of a validated sterilization process; standards may include ISO 11135 for ethylene oxide or ISO 11137 for radiation, as applicable. |
| 2. Inspect the sterile barrier | Examine the pouch, blister, or other sterile-barrier packaging before use. | Packaging should be sealed and free of visible tears, punctures, moisture, or damaged seals. Do not use a product if the sterile barrier is compromised. |
| 3. Check packaging validation | Look for information showing that packaging is designed to maintain sterility through transport and storage. | Where applicable, packaging documentation may reference ISO 11607 for packaging of terminally sterilized medical devices. Follow the product’s storage conditions and handling instructions. |
| 4. Confirm blade design and size | Match the blade profile, dimensions, and intended use to the planned ophthalmic procedure. | Verify the product description and dimensions on the label or IFU. Select only a design specified for the intended surgical application; do not infer suitability from appearance alone. |
| 5. Assess material and edge quality | Review the stated blade material and inspect the cutting edge and finish under suitable lighting before use. | Product specifications should identify relevant materials and provide quality controls for the finished device. Reject blades with visible corrosion, contamination, deformation, or edge damage. |
| 6. Review quality and regulatory information | Check that the manufacturer has a documented quality system and that the product is appropriately authorized for the market where it will be used. | Look for applicable regulatory labeling and current quality-system documentation. ISO 13485 is a commonly used medical-device quality-management-system standard; certification alone does not replace product-specific regulatory requirements. |
| 7. Confirm traceability and use limits | Check the lot or batch identifier, expiry date, single-use status, and any storage or disposal instructions. | Labels should provide traceability information and a use-by date when applicable. Use the blade only as directed; do not reuse a device labeled for single use or use it after its stated expiry date. |
7 Tips for Choosing Ophthalmic Blades
Compare blade dimensions, edge profile, and handle connection with the instruments already used in your setting. A blade that looks compatible may not seat securely. Check the device instructions and tray specifications, especially when replacing a familiar model. Small details matter. Tip: Confirm fit before purchase, not at setup.
Handling deserves equal attention. Consider grip stability, visibility, and how safely staff can pass and dispose of each blade. CDC/NIOSH estimates about 385,000 needlestick and other sharps injuries occur annually among hospital-based healthcare personnel; this figure covers sharps broadly, not ophthalmic blades alone. It still underscores why controlled handling matters. Tip: Review the full workflow, from opening the pack to disposal.
Compare value beyond unit price. Include packaging, shelf life, staff familiarity, and any added processing steps for reusable instruments. The FDA’s guidance, Reprocessing Medical Devices in Health Care Settings (2015), emphasizes clear manufacturer instructions for reusable devices. Those instructions can affect time and consistency. I still find this cost trade-off easy to underestimate. Tip: Compare total use cost across a typical case volume, then reassess after staff feedback. A lower price is not always better.
Compare instrument compatibility, handling, and value. Typical nominal blade widths offer a useful starting point when matching a blade to a planned incision.
How to use this chart: Sideport and MVR knives are commonly available in narrower widths, while keratomes are commonly available in widths such as 2.4 mm and 2.8 mm. Confirm the blade’s dimensions, fit with the instrument, intended use, and handling characteristics in its instructions for use. Actual offerings and incision outcomes vary by blade design and surgical technique.
Start with the planned incision, tissue, and surgical approach. The blade should fit the surgeon’s plan, not just available stock. Small details matter.
Straight, angled, and curved blades support different access needs. A narrow pointed blade may suit controlled entry. A crescent profile may help create a broader tunnel-like incision.
No. A blade that is too narrow may require adjustments, while a wider one may enlarge the opening unnecessarily. The smallest option is not automatically right.
Review the incision’s planned length, width, and location with the operating surgeon. Check blade specifications and facility protocols. Patient anatomy can change the choice.
Check the sterile-barrier label, sterilization method, lot number, and expiry date. Look for punctures, moisture, crushed corners, broken seals, or unreadable printing. Pause if anything seems wrong.
No. Appearance alone cannot confirm sterility. Follow facility procedures when packaging is damaged or information is unclear. A quick glance may not be enough.
Traceable lot information helps the team review relevant quality and sterilization documentation. Packaging standards address sterile barriers, but they do not make damaged packaging acceptable.
Consider handle comfort and visibility under the microscope. A blade that is hard to orient can make a small task less predictable. Worth checking.
Choosing the right Ophthalmic Blades starts with understanding the procedure and the incision it requires. Consider the location, length, and precision of the cut, then select a blade shape and size suited to the surgical task. A well-matched blade can support controlled handling and help meet the needs of delicate eye procedures.
Before making a selection, assess the blade’s material, sharpness, and edge quality, along with its sterility, packaging, and applicable quality standards. Check that it is compatible with the intended instrument and feels manageable for the user. Comparing these practical factors, as well as overall value, can help guide a thoughtful choice. Always follow professional protocols and the instructions provided for the instrument and procedure.
Carna Medicial Technology