How to Choose the Best Ophthalmic Tools?

Time:2026-10-14 Author:Isabella
0%

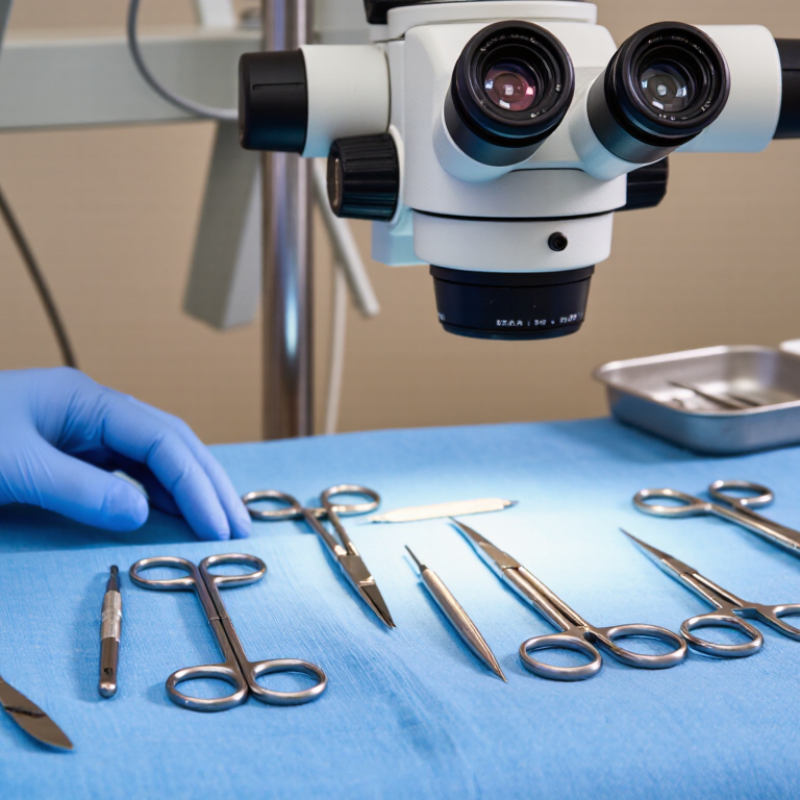
Choosing the best Ophthalmic Tools begins with the patient, not the product catalog. Surgeons must consider procedure type, tissue sensitivity, hand control, and operating-room workflow. A forceps that feels precise during microsurgery may feel awkward after prolonged use. Balance matters. So does grip.

The instrument’s tip should match the intended task. Smooth jaws can reduce unnecessary tissue trauma. A sharp, stable blade can improve incision control. Visibility is equally important under the microscope. Reflections, poor contrast, or a crowded handle can interrupt concentration. As ophthalmic surgeon Charles D. Kelman famously said, “If you can make it smaller, you can make it safer.” His words still influence modern instrument design, especially in minimally invasive procedures.

Reliable selection also requires evidence beyond marketing claims. Review clinical feedback, sterilization compatibility, material quality, warranty support, and maintenance requirements. Ask whether the tool preserves performance after repeated cleaning cycles. Ask how easily staff can identify damage. These details seem minor.

They are not.

There is no universally perfect instrument. A premium tool may offer excellent precision but exceed a clinic’s practical budget. A familiar design may feel safer, yet newer ergonomics could reduce hand fatigue. Personal preference can also distort judgment. For that reason, surgeons should compare tools in realistic conditions, involve experienced staff, and document performance over time. The best Ophthalmic Tools are not simply the most advanced. They are the ones that support consistent, controlled, and patient-focused care.

How to Choose the Best Ophthalmic Tools?

Understanding the Main Types and Uses of Ophthalmic Tools

How to Choose the Best Ophthalmic Tools?

Understanding the main types and uses of ophthalmic tools makes selection more practical. A slit lamp provides a magnified view of the cornea, iris, lens, and anterior eye. An ophthalmoscope helps clinicians examine the retina and optic nerve. These tools support different examinations. One cannot replace the other.

Tonometers measure intraocular pressure and require careful patient positioning. Retinoscopes help estimate refractive errors, especially during pediatric examinations. Trial lenses and lens holders support subjective refraction. Keratometers measure corneal curvature, while pachymeters assess corneal thickness. Each instrument needs suitable training and regular calibration. Small errors matter.

In supervised clinical settings, tool selection should match the examination goal, patient age, and working environment. A lightweight instrument may improve control during long consultations. Clear illumination and comfortable handles also reduce unnecessary strain.

Hygiene is essential, especially for tools touching the eyelids or surrounding skin. Follow approved cleaning procedures and inspect surfaces between patients.

A common mistake is choosing advanced equipment before understanding basic examination methods. More features do not always mean better results. I still think convenience can distract from accuracy. Check measurement consistency, maintenance support, and staff competence before purchasing. Reliable tools should produce repeatable findings, not merely impressive displays.

Assessing Clinical Requirements and Patient Examination Needs

How to Choose the Best Ophthalmic Tools?

Choosing ophthalmic tools starts with patient needs, not an equipment catalogue. A busy clinic may require a slit lamp, tonometer, autorefractor, and fundus imaging system. However, the correct combination depends on daily examinations. Routine refraction needs speed and repeatability. Anterior segment assessment requires clear illumination and adjustable magnification. Glaucoma screening demands reliable pressure readings and consistent calibration.

Look at the workflow. A child may struggle to maintain fixation, while an older patient may need a stable chin rest and simple instructions. Patients with limited mobility need accessible positioning. Infection control also matters when equipment touches the face or skin. Ask whether surfaces can be cleaned safely between examinations. Small delays can become significant during a crowded clinic day.

Clinical staff should compare measurement accuracy, user training, maintenance needs, and data compatibility. Recognized clinical guidelines can support this process, but local practice requirements still deserve attention. Keep calibration records and document staff competency. A tool with many features may still slow examinations. No selection is perfect. I have found that teams sometimes overvalue advanced imaging while overlooking patient comfort and operator skill. A short trial with real patients can reveal awkward controls, unclear displays, or unsuitable working distances. Review those findings honestly before making a final decision.

Comparing Tool Quality, Precision, Safety, and Compatibility

How to Choose the Best Ophthalmic Tools?

Tool quality begins with materials, construction, and consistent performance. Look for corrosion-resistant steel, smooth joints, and handles that remain secure during delicate movements. A polished surface alone proves little. Inspect the tips under magnification for alignment, burrs, or uneven contact. Small defects can damage tissue or reduce control.

Precision matters when working near fragile structures. Forceps should close evenly without excessive pressure. Scissors need sharp, balanced blades that cut cleanly instead of pulling tissue. Test the instrument with fine surgical material before clinical use. Check whether the grip stays comfortable during prolonged procedures. Hand fatigue can quietly reduce accuracy. That detail is easy to underestimate.

Safety depends on design, cleaning, and traceability. Instruments should tolerate the facility’s validated sterilization process without losing alignment or surface quality. Confirm that hinges can be fully cleaned and inspected. Compatibility also deserves practical testing. The tool must fit the microscope’s working distance, surgical tray, and other instruments used in the procedure. Confirm measurements, connection points, and handling space before purchase. A theoretically compatible tool may feel awkward in real use. No selection process is perfect. Reassess performance after repeated sterilization, not only after the first inspection.

Checking Ergonomics, Maintenance, Sterilization, and Durability

Choosing the best ophthalmic tools requires more than checking sharpness or appearance. In my experience, ergonomics strongly affects control during delicate procedures. A well-balanced instrument should rest naturally between the fingers, without forcing the wrist upward. Textured handles can improve grip, but excessive patterns may trap debris. Test the tool with gloves, because comfort can change noticeably.

Maintenance should be practical for the entire clinical team. Check whether joints move smoothly and whether markings remain readable after repeated cleaning. A small hinge problem can become a serious handling concern. Follow the manufacturer’s validated cleaning instructions and inspect tools under bright light. I once overlooked a slightly loose mechanism during a routine check. That mistake changed how carefully I inspect every set.

Tips: Confirm sterilization compatibility before purchase. Ask for documented processing instructions, material information, and durability testing. Choose designs that tolerate the facility’s approved sterilization method without corrosion, discoloration, or loss of function. Keep a maintenance log, including cleaning issues, repairs, and replacement dates. Separate damaged instruments immediately. Do not rely on appearance alone. Some flaws are difficult to see. When possible, let surgeons and sterilization staff evaluate the same tool, because their needs may differ. Reassess performance after several processing cycles, not only on the first day.

Selecting Suppliers, Verifying Standards, and Managing Costs

When choosing ophthalmic tools, supplier evidence matters more than polished catalogs. WHO’s World Report on Vision estimates that at least 2.2 billion people live with vision impairment. That scale makes dependable instruments a clinical duty, not a purchasing preference. Ask for ISO 13485 certification, device registration records, sterilization instructions, and traceable lot numbers. Verify IEC 60601 compliance for powered equipment and ISO 10993 data when patient contact applies. Request samples for slit-lamp compatibility, grip comfort, image clarity, and repeated cleaning. Paperwork alone is not enough.

Cost control requires a wider view. OECD’s Health at a Glance 2023 reports average health spending of 9.2% of GDP across OECD countries in 2022. Hospitals therefore need more than the lowest quotation. Compare service intervals, calibration fees, training, spare parts, delivery time, and expected replacement cycles. A cheaper instrument may create hidden costs through downtime or inconsistent results. Still, supplier promises are not perfect evidence. A modest trial can reveal weaknesses that a formal checklist misses. Keep test records, user feedback, and corrective actions together.

Tips: Use a weighted scorecard before negotiation. Give quality and compliance more weight than price. Check three recent customer references. Confirm warranty exclusions in writing. Recalculate total ownership cost after every sample test. Leave room for doubt; real clinical use is often messier than specifications.

How to Choose the Best Ophthalmic Tools? — Selecting Suppliers, Verifying Standards, and Managing Costs
Evaluation Dimension What to Check Objective Evidence to Request Practical Benchmark or Decision Rule Priority
Intended Use Confirm whether the tool is intended for examination, microsurgery, measurement, tissue manipulation, or another clinical task. Intended-purpose statement, instructions for use, risk classification, and compatibility information. Reject products whose documented intended use does not match the planned clinical procedure or user group. High
Supplier Quality System Assess whether the supplier controls design, production, complaints, corrective actions, and document changes. Current ISO 13485 certificate from an accredited certification body, audit summary, and quality agreement. Prefer suppliers with a current certificate covering the relevant medical-device scope and production site. High
Regulatory Authorization Verify that the product can legally be supplied and used in the target market. Declaration of conformity, applicable market authorization, device registration details, and authorized representative information where required. Check the exact model, legal manufacturer, intended purpose, and market; do not rely only on a generic conformity logo. High
Risk Management Review hazards such as tissue damage, incorrect measurement, breakage, contamination, and loss of function. Risk-management summary aligned with ISO 14971, residual-risk information, and documented control measures. Residual risks should be acceptable for the clinical application and clearly addressed in labeling or training. High
Biocompatibility Evaluate patient-contacting materials, contact duration, sterilization effects, and possible irritation or sensitization. Material specification, biological-evaluation report, and applicable ISO 10993 test or justification records. Require evidence appropriate to the type and duration of patient contact; avoid undocumented material substitutions. High
Sterilization and Reprocessing Determine whether the tool is single-use or reusable and whether the facility can process it consistently. Validated cleaning, disinfection, and sterilization instructions; maximum reprocessing-cycle data; packaging information. For reusable tools, select products with validated instructions compatible with the facility's available equipment and workflow. High
Material and Corrosion Resistance Check resistance to repeated exposure to moisture, cleaning agents, disinfectants, and sterilization temperatures. Material grade, surface-finish specification, corrosion testing, and maintenance instructions. Inspect joints, coatings, serrations, and cutting edges for corrosion or residue retention after simulated processing. High
Optical and Mechanical Performance Assess visual clarity, magnification accuracy, illumination, alignment, grip, movement, and tip geometry. Inspection records, calibration certificates where applicable, dimensional drawings, and performance-test results. Verify performance using representative samples under realistic operating conditions, not only catalog specifications. High
Electrical Safety For powered ophthalmic equipment, check electrical, thermal, mechanical, and electromagnetic safety. Applicable IEC 60601-1 test evidence, electromagnetic-compatibility documentation, and electrical safety instructions. Apply this requirement to powered tools and systems; it is generally not relevant to purely manual instruments. High
Usability and Human Factors Evaluate whether users can operate, clean, identify, and store the tool correctly without avoidable errors. Usability-engineering file or summary aligned with IEC 62366-1, user instructions, and training materials. Conduct a hands-on evaluation with representative clinicians and reprocessing staff before approval. High
Traceability Confirm that products, batches, serial numbers, accessories, and service records can be traced. Unique-device identification details where applicable, lot or serial-number format, certificates of conformity, and delivery records. Do not approve products that cannot be linked to a specific supplier, production batch, and quality record. High
Supplier Performance Review delivery reliability, complaint response, change notification, technical support, and replacement capability. References from comparable healthcare users, service-level terms, complaint procedure, and business-continuity information. Use documented service targets and require advance notification of material, design, manufacturing-site, or labeling changes. Medium
Sampling and Acceptance Testing Define incoming-inspection checks for dimensions, surface condition, function, packaging, and labeling. Approved inspection plan, sampling method, acceptance criteria, and nonconformance procedure. Use risk-based sampling; apply 100% inspection to critical characteristics when failure could cause serious harm. High
Training Requirements Estimate the training needed for clinicians, technicians, and reprocessing personnel. Competency checklist, training records, demonstration videos, and user qualification requirements. Prefer tools with clear operation and reprocessing steps when performance is otherwise comparable. Medium
Purchase Price Compare the quoted unit price, included accessories, delivery charges, taxes, and minimum order quantities. Itemized quotation with model, quantity, warranty, lead time, accessories, and payment terms. Compare equivalent configurations only; a lower unit price may exclude essential accessories or service. Medium
Total Cost of Ownership Include acquisition, installation, training, calibration, maintenance, reprocessing, consumables, downtime, and disposal. Five-year cost model, preventive-maintenance schedule, spare-parts list, and expected service life. Total cost = purchase price + operating cost + maintenance + reprocessing + downtime + replacement/disposal cost. High
Warranty and Serviceability Check warranty duration, exclusions, repair turnaround, loaner availability, and spare-parts support. Written warranty, service manual or service scope, repair process, and availability commitment. Set a maximum acceptable repair turnaround and define responsibilities for transport, inspection, and replacement. Medium
Environmental and Disposal Considerations Consider packaging, material composition, energy use for powered devices, and disposal of contaminated or electronic components. Packaging specifications, material declarations, disposal instructions, and applicable environmental compliance information. Prefer durable reusable designs when clinically appropriate and when reprocessing can be performed safely and consistently. Low
Final Supplier Score Combine safety, compliance, performance, service, and cost into a documented purchasing decision. Weighted evaluation matrix, trial results, corrective-action records, and approval signatures. Use a weighted score such as: safety and compliance 35%, clinical performance 25%, supplier quality 15%, lifecycle cost 15%, service and delivery 10%. High
Recommended approval rule: A tool should not be approved solely because it has the lowest price. First confirm intended use, regulatory status, safety evidence, biocompatibility, reprocessing suitability, and clinical performance; then compare suppliers using total cost of ownership and documented service capability.

FAQS

What does a slit lamp examine?

A slit lamp magnifies the cornea, iris, lens, and front section of the eye. It cannot replace a retinal examination.

When is an ophthalmoscope useful?

An ophthalmoscope helps clinicians inspect the retina and optic nerve. It serves a different purpose from a slit lamp.

How do tonometers support eye examinations?

Tonometers measure intraocular pressure. Careful patient positioning is essential for dependable readings.

Which tools help assess refractive errors?

Retinoscopes estimate refractive errors, especially in children. Trial lenses and lens holders support subjective refraction.

What should guide tool selection?

Match the instrument to the examination goal, patient age, and clinical environment. A lightweight handle may improve control during long consultations.

Why are calibration and training important?

Each instrument requires suitable training and regular calibration. Small errors matter. Results should remain consistent across repeated examinations.

How should ophthalmic tools be cleaned?

Follow approved cleaning procedures for each instrument. Inspect surfaces between patients, especially around eyelid-contact areas.

What ergonomic details deserve attention?

The instrument should rest naturally between gloved fingers. Textured handles can improve grip, but deep patterns may trap debris.

How can a facility evaluate durability?

Check joints, markings, hinges, and surfaces after repeated processing cycles. A loose mechanism may seem minor, but handling can worsen.

What records should maintenance teams keep?

Keep a log of cleaning problems, repairs, and replacement dates. Separate damaged instruments immediately. Appearance alone is unreliable.

Conclusion

Choosing the best Ophthalmic Tools requires a clear understanding of their main types, functions, and applications in routine examinations, diagnosis, treatment, and surgery. Clinics should first identify their specific clinical requirements, patient examination needs, and expected frequency of use. Each tool should then be evaluated for optical or mechanical precision, safety, material quality, compatibility with existing equipment, and suitability for different procedures. Reliable performance and accurate results are essential for supporting effective patient care.

Practical considerations are equally important. Ergonomic design can reduce user fatigue and improve control during extended procedures, while easy maintenance, effective sterilization, and durable construction help ensure long-term value. When selecting suppliers, healthcare providers should verify product standards, documentation, quality assurance procedures, and after-sales support. Cost should be assessed not only by the initial purchase price but also by maintenance, replacement, training, and operating expenses. A balanced decision combines clinical performance, safety, usability, compliance, and total ownership cost.

Isabella

Isabella

Isabella is a dedicated marketing professional with a sharp focus on driving brand growth and engagement through strategic content creation. With an extensive background in digital marketing, she combines her passion for storytelling with her keen understanding of industry trends to deliver......